
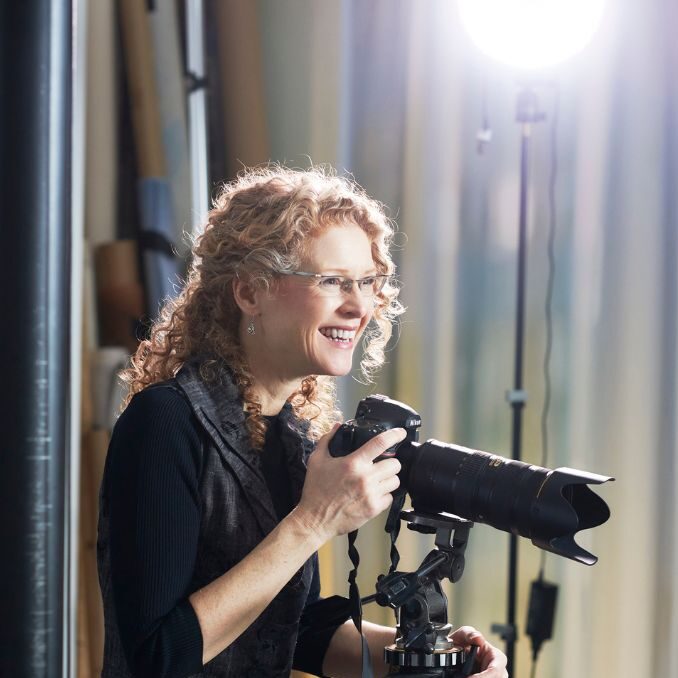
By Kathryn Hollinrake | Photos by Kathryn Hollinrake
As a professional photographer, I’ve learned there are so many little things that can impact the success of a portrait. Fortunately, some of these things are fully in your control.
No, I don’t mean with Photoshop. It’s true almost anything can be fixed in post-production — with a certain budget. Not only is that budget rarely available for difficult problems in corporate portrait-land (my current specialty), I think it’s a waste of time and money to fix something that could have been avoided in the first place with some care and planning.
To help you prepare for and get the most out of a professional portrait session, I’m sharing guidelines based on what I’ve encountered over 25+ years as a photographer and retoucher. I am sure some will seem, and in fact are, relevant only to some — and I hope nobody feels excluded or offended. (If you’d like a broader range of tips, you can find them on my LinkedIn and my blog.)
I also know, from the many times I’ve been the one in the photo, that it’s not easy to just wear the right clothes, have the perfect hair and makeup, and project nothing but confidence with your pose. But with a bit of prep (and help from the right photographer) getting a shot you want to share with the world is possible. I know you will look great for your next shoot — especially if you follow all of my suggestions!

Tip #1: Breathe
Once you arrive at your photo session, breathe. Why would I say this? Because people filled with dread hold their breath. I work with people all the time who come to portrait shoots geared up for what they anticipate will be a fairly short but painful nightmare, “knowing” they are unphotogenic and they will probably hate the results. Determined to get this thing over with (and make it count!), they stop breathing.
Remember it’s your photographer’s job to help you find your way through and past this first and very real obstacle. I encourage you to embrace the idea that you are in good hands, take a deep breath or twenty, and keep breathing. Slow down, listen, and trust. When people stop breathing they tend to tense up, their shoulders go up, their neck tendons flex, and they positively, silently scream “uncomfortable!” Nothing can suck the power out of a portrait faster than the appearance of overwhelming and unmitigable discomfort.
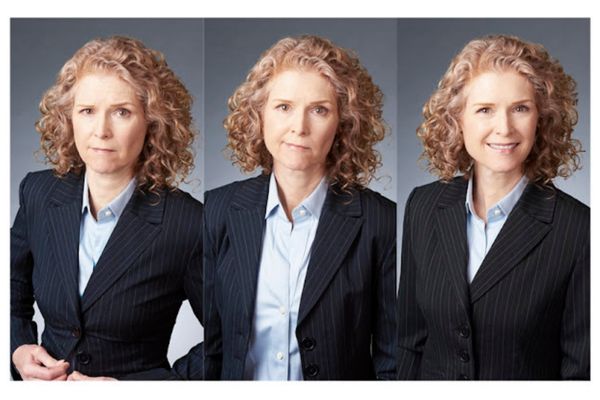
Tip #2: If you wear a suit, make sure that it fits.
A portrait in which the suit fits perfectly will outshine a portrait featuring a lumpy suit every time. This might seem obvious, but for many of us it can be incredibly difficult to find a jacket that doesn’t bunch and pull in various spots. I have photographed myself to illustrate blog posts and articles for years now, and I always start with a jacket I’m pretty sure fits fine — but often discover it does something in a photograph that I consider distracting and unacceptably imperfect. You can try posing and pinning to mitigate wrinkles, but sometimes it is impossible to get rid of them. They make successful retouching too difficult and time consuming to be practical, especially if the suit fabric is textured or patterned.
How do you know if it fits? Make sure you can comfortably do up a button. You will look more polished and pulled together with a neatly closed jacket. You will feel more confident if you are comfortable and you know you look good. And if your portrait is cropped as a head and shoulders image, your face will be nicely framed by the ‘v’ of the neckline. If you are not sure what works best, and time allows, bring options for your shoot.
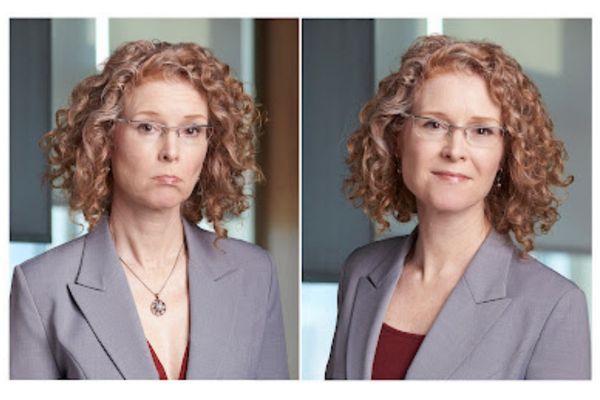
Tip #3: Higher necklines are always the safer option.
Ideally a neckline will be fully contained within the frame of a portrait. This way your wardrobe helps to frame your face and the viewers eyes aren’t pulled off the edge of the frame. It is not terribly unusual to find that the neckline of a top that seems business appropriate in real life disappears off the bottom edge of a typical head and shoulders portrait crop. This can catch people by surprise, as can the apparent disappearance of the top under a jacket when that jacket is closed; we generally want the jacket closed to make a nice ‘v’ to frame the face.
My advice is to play it safe and opt for a higher neckline, and remember, you can think beyond tops. If you have a dress that works — even if it’s one you’d never wear to work — try wearing that. With a head and shoulders portrait nobody cares what’s going on below the crop.
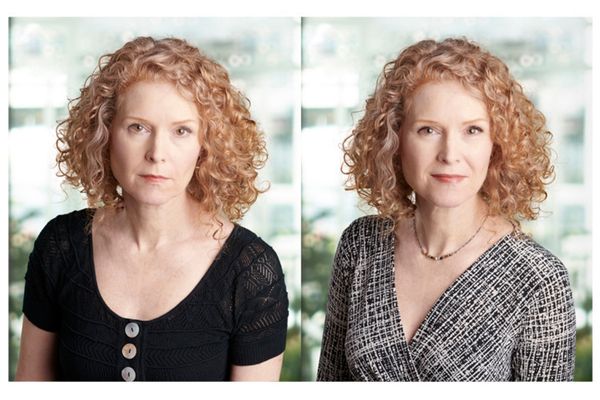
Tip #4: Wear long sleeves for head and shoulders portraits.
If you plan to wear a dress or top without a jacket, avoid short sleeves for head and shoulders portraits. Why? The crop is probably going to be somewhere above your elbow. As such, it can be a bit distracting for viewers if the bottom left and right corners feature the skin of your arms, especially if your skin is noticeably lighter or darker than your clothing.
As for sleeveless dresses or tops, it’s pretty universally advised to avoid them for business portraits. Some companies’ corporate photo guidelines even expressly forbid them. Long sleeves will almost always be the most flattering and most professional looking option.

Tip #5: Work with a professional makeup artist.
There are typically three options for portrait makeup: DIY (free), department store makeup counter (token product purchase), and professional makeup artist (professional fee). Whichever option your budget allows, remember what you are trying to do: Show your best authentic self to the world, refreshed and maybe a bit enhanced. You don’t want to end up looking unrecognizable.
In my experience, a professional is worth the investment to meet that goal. A good make-up artist (paired with good moisturizer and communication!) can help you show up as your best self while still looking like yourself. That means wearing just the right amount of make-up for you, wherever that is on the spectrum — from full glam to practically none.
With the same goal of authenticity in mind, try to avoid getting a haircut from a new stylist right before you get a new portrait done. A professional make-up artist may be able to rescue you, but if not, I think most people know the potential for distress and disappointment here. I have seen it!
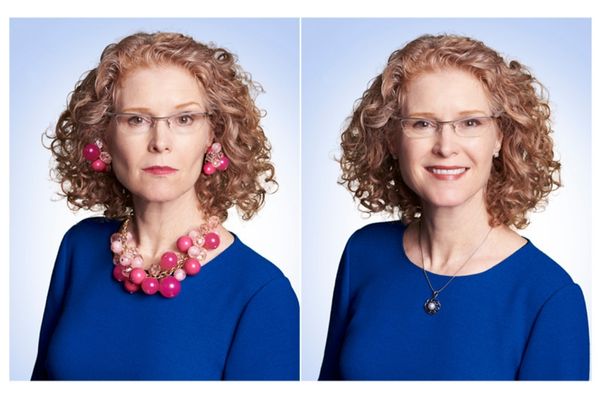
Tip #6: Keep jewellery simple.
Unless you are a jeweller looking to advertise your work via your business portrait, then the general guideline is to stick to more understated jewellery. I acknowledge the welcome movement towards people bringing their whole, unique, authentic selves to work, personal style and all. But the most consistently you part of you is your face. So to a large extent that’s where you want people’s focus. The added advantage of wearing subtler jewellery is that it will be less likely to date your portrait when styles change. While Fashion magazine’s May 2022 issue said that “statement necklaces are back in style,” I suggest that this be considered less relevant to us in business portrait world. Avoiding wearing trendy jewellery or wardrobe is one good way to stave off having to do a new professional portrait every year.
Tip #7: Lean in.
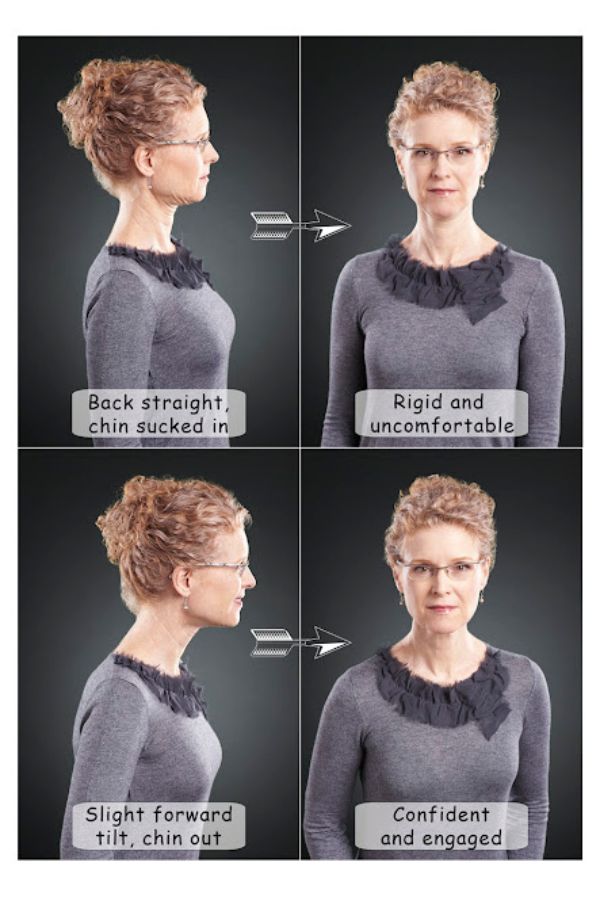
Yes, this one’s really simple. Particularly when someone is really not excited or is, more accurately, filled with dread at the idea of being photographed, but is also committed to doing their best to get through it. Their default posture can be rigid, back straight up and down, chin sucked in, at attention! But this stance can make people look timid, uptight, and freaked out. You may be all these things, but you don’t want to look like it!
You can make great headway towards appearing to be the total opposite by merely leaning in. You want to look relaxed, confident, and engaged, and step one to appearing to be those things is a bit of a tilt forward, back still straight, shoulders back, hinging from the hips, allowing the chin to come forward a wee bit so the angles of your jawline will be nicely defined above your tension-free and extra-chinless neck.
Tip #7: Lean in.
Yes, this one’s really simple. Particularly when someone is really not excited or is, more accurately, filled with dread at the idea of being photographed, but is also committed to doing their best to get through it. Their default posture can be rigid, back straight up and down, chin sucked in, at attention! But this stance can make people look timid, uptight, and freaked out. You may be all these things, but you don’t want to look like it!
You can make great headway towards appearing to be the total opposite by merely leaning in. You want to look relaxed, confident, and engaged, and step one to appearing to be those things is a bit of a tilt forward, back still straight, shoulders back, hinging from the hips, allowing the chin to come forward a wee bit so the angles of your jawline will be nicely defined above your tension-free and extra-chinless neck.

Kathryn Hollinrake
Kathryn Hollinrake has been “making people and things look pretty” as a professional photographer for over twenty-five years after graduating at the top of her class with a Bachelor of Technology in photography from TMU (then Ryerson). During her long and diverse career she worked briefly for Kodak, then started her business as a commercial and editorial photographer shooting everything from food to dogs to people, shot weddings, produced and exhibited fine art, acted in TV commercials and finally found her tribe in corporate and portrait photography where she collaborates with businesses and individuals to make their branding imagery shine. To learn more about Kathryn’s work, connect with her on LinkedIn or find her online at hollinrake.com.